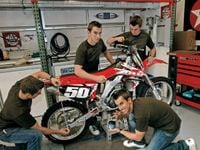
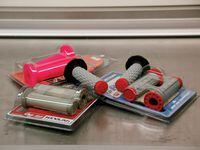
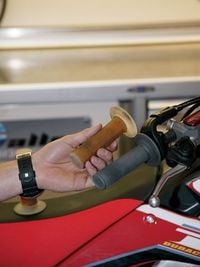
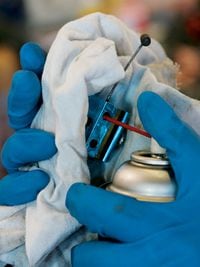
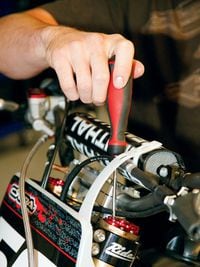
Keeping a modern dirt bike in absolutely perfect mechanical condition can be a pretty daunting task. While most of us love the riding part of dirt bikes, only a lucky smaller percentage enjoys working on the bike, too. But even if you get a massive grin at the idea of wrenching, chances are your bike can still benefit from the 10 points covered here. Whether our personal bike, a test bike or even the odd privateer race bike, they all need care that often gets ignored until problems become obvious. None of these 10 steps will break the bank, especially if you do the work, and taking care of these potential problem areas will all but guarantee a fun and trouble-free ride. So hit the garage!01 Bleed your brakes. Your bike can be the fastest thing on earth, but if it can't stop when you need it to, you end up becoming a heap of broken parts. Most riders neglect the brakes; they just change the pads when they're worn but never look to see if the fluid condition or level is OK. If you think the brakes are starting to fade, check the fluid immediately! You have a problem if the fluid is dark or low in the reservoir. Fresh brake fluid is fairly heat stable, but water isn't, and brake fluid will absorb water over time. That's a major reason that brake fluid deteriorates. Anytime the brake system has been used hard and heated, you should bleed the brakes. To bleed the brakes, you must clean the reservoir and remove the cap. Fill it with clean fluid to keep it from running dry. Pump and hold the brake pedal or lever, then quickly open the bleeder fitting with a wrench and immediately close it back up without releasing the brake lever. Pump up the brake, hold it and bleed it again. Do this three or four times, or until you no longer see any air bubbles coming out with the fluid. Use a length of clear tubing over the bleeder fitting to avoid a mess and to prevent brake fluid from getting on the rotor and brake pads. If the fluid appears dark or burned, just keep filling the reservoir and bleeding the system until clean fluid comes out. Use a good fluid brand, but know that the high-temp products generally absorb water easier than regular brake fluid. Be sure to use the type of fluid that's specified for your bike. Remember, you can't go fast if you can't stop.02 Put on new grips. Unless your grips are almost brand-new, new ones will make a big difference. Grips have traction edges molded in that offer glove traction just like a tire, so give your hands a fresh knobby. And just don't throw on any grip or the one the local fast guy runs. Some people have "their" grip that they will only use, but for people who don't know, there's an ocean of grips from which to choose. If you have small hands, there are no-waffle, small-diameter grips, and for large hands, there are full-waffle and even vibration-damping grips. There are also different compounds: soft, medium, hard, gel, foam and the multidensity gels. Just try them out one at a time and see which one is your glass slipper. Generally, if you have large hands, try a grip with a larger outside diameter. Conversely, if you have a smaller hand, try a smoother, smaller-diameter grip, perhaps in a softer compound. If you blister easily, go with a soft compound but be aware that they wear quickly. If you prefer traction to come from your gloves instead of your grips, try a firmer compound. Most riders run a soft-to-medium grip. Even if you don't replace the grips, safety-wire them. Use at least one wrap at each end of the grip. Wire as close as possible to the flange end of the grip to keep water from getting under the grip and making it slip. Finally, don't decide to install new grips right before a ride. You might find damage to the throttle tube or handlebar that needs attention. Some throttle tubes have the grip bonded on, and getting those off is a pain. Plus, the glue needs time to cure, especially with soft grips. Use the manufacturer's glue if it makes some; soft grips have a habit of falling apart with aggressive glues or other chemicals.
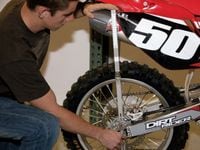
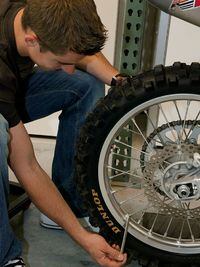
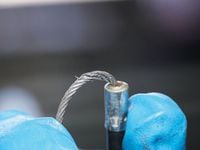
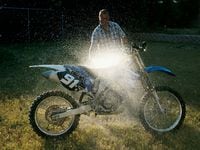
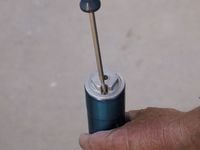
03 Dial in your suspension. You can spend thousands of dollars in engine mods and go-fast parts for your bike to get that factory-bike look and feel. But the crucial element is your suspension. Manufacturers spend huge sums on suspension testing and tuning, and you can capitalize on their time and effort by using the adjusters and setting the race sag to accommodate your size and riding style. Learning to properly set suspension isn't easy. You must spend time testing the different settings (it can be hard to force yourself to use a riding day on setup when you don't get many opportunities to ride), but the work is definitely worth it. Suspension tuning with the external adjusters your bike came with is free. You can't find a better performance-enhancing bargain than that.Begin by digging out the manual to see what adjustments are available and what the stock settings are. Then set the rear suspension's race sag. Different models vary in the actual measurement, but all bikes are measured the same way. Support the bike with the wheels off the ground, then use a sag tool or a tape measure to find the distance from the rear axle to a spot on the rear fender. Just mark the fender so you can repeat the measurement. A spot directly over the axle is best. Sit on the bike and measure between the axle and rear fender again. Subtract the second measurement from the first. Naturally, this is easier with a metric tape. A rule of thumb for a good sag setting is 95-105mm (3.75-4.25 inches) for full-size bikes. Write your stock and current suspension adjuster settings on your bike in permanent marker as an easy reference; if you check and record all of the settings, you're more likely to make adjustments for different track conditions. Knowing you can always go back to where you were takes away the fear of change. It isn't even necessary to know or understand what each suspension adjustment does, though it helps. As long as you pick one adjuster at a time and make small changes, all you really need to know is whether the change made the bike handle better or not. If you can't feel a small change, try a bigger one. It's OK, you can always put it back if it doesn't work! Find a spot where you feel the bike isn't working well. For example, braking bumps. Choose a section of braking bumps with a safe way to exit and enter the track, then repeat that section while making adjustments. Once you arrive at a setting you like, ride the rest of the track to see if you traded away confidence on jumps or turning precision to get the feel you wanted in bumps.04 Check your spokes. When was the last time you checked them? Loose or bent spokes can result in flat tires, bent rims and a bad day on the trail or at the track. Your bike's spokes are like small shock absorbers: They flex and twist, taking some of the shock for you. All of this shock stretches the spokes and loosens them. While you don't want loose spokes, you don't want them rigid where they ping like piano strings, either. Overtightening may result in broken spokes. New wheels are especially crucial to check because the spokes haven't been fully seated into the hub. Make sure to break in the wheels and inspect the spokes before you attempt a long ride or a hard race.05 Change your suspension fluids. The most neglected parts of your bike are often the most crucial. Suspension fluid doesn't last forever; in fact, it wears out relatively fast. The most neglected is the rear shock. Your fork has more than twice the oil capacity of the shock, so the shock's oil is worked harder and subjected to much greater heat. Suspension fluid fatigue results in poor suspension performance and may severely affect your machine's handling. If you've spent hundreds of dollars on suspension revalving, all that money is wasted if you run it until the fluid is bad.06 Care for your cables. Stiff or sticky cables are difficult to pull and can fatigue you more than you realize. Your hands are what keep you and your bike in control, so you want your control mechanisms to work as easily as possible. There are two schools of thought on the best way to improve cable feel: For the absolute minimal effort required, lubricate the cables with specialty cable lubricants, but the easy effort has costs. Lubed cables attract dirt, and once lubed, they need to be cleaned and lubed regularly. So do you want the absolute lightest control efforts enough to routinely relube? If not, run the cables dry (all are now Teflon-lined) and replace them frequently or lube them with a drying type of lube. A smooth and easy throttle is always easier to control than a rough, sticky one. And everyone knows that a well-lubricated clutch makes for a sweet clutch pull. The other upside of lubricating your cables is that the life of the cable greatly increases. Generally, the stock routing is best, but look for pinch points or places where the cable gets too close to the exhaust pipe.
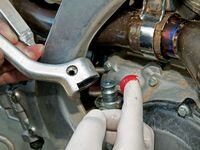
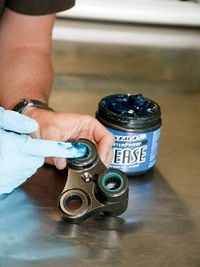
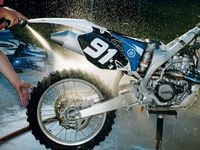
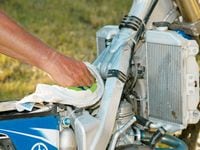
07 Grease the moving parts. Grease is totally your bike's friend. The stuff is a mess, but it rules on the more-bang-for-your-buck scale. Nothing as cheap will make a bike feel so good, and surgical gloves defeat the messiness. Every moving part on the chassis needs to be clean and greased to operate properly (and not rust solid). That means to begin with the steering head, linkage points and swingarm pivot. But don't forget the rear brake pedal, control pivots and the kickstarter knuckle. Look in the manual; the kickstart lever comes apart, and it needs grease. To test this theory, ride your buddy's bike (the guy who thinks his bike is greased from the factory), and directly after, ride your bike (the one you just spent time on greasing the bearings). Yours will be a much sweeter ride. The few hours in the garage with your new bike will be a good bonding experience and will help you get to know the ins and outs of your machine. This isn't a one-time operation, though. If you have an older bike or just put a lot of hours on your new one, it's probably time to make a weekend for your beloved machine to clean and grease the pivots and bearings. And one of the secrets about bikes prepped for magazine testing is they are all lubed up.08 Wash your bike. When was the last time you really gave your steed a good rub and tug (cleaned the chain thoroughly, washed behind and underneath the swingarm and cleaned off all the gunk on the linkage and underside of the motor)? Take off the tank and plastic and wash them. I'm talking about a full-on detailing of your bike. Washing a bike this thoroughly allows you to see what condition it's really in. Look at the frame and subframe for cracks or stress marks. Look at the chain sliders and see if they are past their wear mark. See if all of your engine and suspension seals are in good shape. And make sure that everything is in good working order (i.e., wiring connectors/terminals, cables, battery connections and so on). This sort of wash is great as a pregreasing ritual. Consider it like giving your bike a physical, and you'll have one sweet-looking ride to take out on your next trip.09 Bleed the air from the fork. Actually do this now and each time you ride. The fork is a somewhat sealed system, and it works best when the air pressure inside matches the pressure outside. If you go up or down in altitude, the pressure will be off. Plus, pressure builds with temperature and while you ride. There's a reason the fork manufacturer put a bleed screw on top. If you're really smart, buy some of the push-button-type bleeders, install them and have better suspension action at the push of a button.10 Consider spending to save. Some expenditures now can save big bucks in the long term. For example, get some neoprene fork seal protectors like SealSavers or Shox Sox-if you'd rather ride your bike than work on it, use these to save your fork seals. They don't actually wipe junk off the steel fork tube; they keep rocks thrown by the front wheel from hitting and damaging the chrome sealing surface. You can also put an O-ring chain on your bike. If you're just a regular rider buying your own parts, you need an O-ring chain. Even if you're a moto-only rider, an O-ring chain is a sound investment. An O-ring chain will outlast a standard chain-even an expensive one-many times over. The sprockets are most worn by a stretched and worn chain, so sprocket costs will drop as well. If you're a picky, sensitive 125cc two-stroke or 250cc four-stroke rider, you might notice a difference in throttle response. If you think you're that guy, look for one of the new, lighter X-ring type chains that have less drag. Most of us will never feel the difference except in our wallets. Buy tires that suit your riding terrain. Tires aren't just black donuts with bumps; they're designed for specific uses and soil types. Many riders get stuck in a tire rut, buying the same thing every time, winter or summer. Experiment with tires: If you ride all hardpack, try a hard-terrain tire; if you have sand or mud, try a soft-terrain tire. The difference in control and performance can be amazing, and the correct tire may not save cash but for sure will maximize the performance you get from your bike.How about nine more tips?! Check out www.dirtrider.com.
/cloudfront-us-east-1.images.arcpublishing.com/octane/IA5RXK6UIFH3DK27GESHX7AVQE.jpg)
/cloudfront-us-east-1.images.arcpublishing.com/octane/AOHPH3HH5NBWXLQYM5DCRP24KU.jpg)

/cloudfront-us-east-1.images.arcpublishing.com/octane/RDDZGBQ765DRFFQ33NJ5OOJB24.jpg)
/cloudfront-us-east-1.images.arcpublishing.com/octane/IJKHCBXIQ5BSBE7DE4T7IMRU2M.jpg)
/cloudfront-us-east-1.images.arcpublishing.com/octane/6RUIY2WGMBBOXKSQ2KTM4TW65Q.jpg)
/cloudfront-us-east-1.images.arcpublishing.com/octane/MUUBXT3VFJALHHSP5EZGDYJ2RE.jpg)
/cloudfront-us-east-1.images.arcpublishing.com/octane/RVSC4E3MLFD63L652VSVMADVGM.jpg)
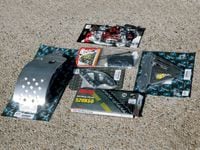
/cloudfront-us-east-1.images.arcpublishing.com/octane/6TMLEAGG4BBF7HLPNZAPK3VIM4.jpg)
/cloudfront-us-east-1.images.arcpublishing.com/octane/GHHRPSL4BNDVVIVVYPRFIA6YO4.jpg)
/cloudfront-us-east-1.images.arcpublishing.com/octane/VW2RQSNW4VAULATYU6CN6NKHPI.jpg)
/cloudfront-us-east-1.images.arcpublishing.com/octane/SAIMEX2SYVGNHHL2GR7N2C7MPU.jpg)
/cloudfront-us-east-1.images.arcpublishing.com/octane/5557EDNRDJHEBGQBXQFOGTL4XQ.jpg)
/cloudfront-us-east-1.images.arcpublishing.com/octane/6CPBOVG46RBKLFFHUMOXCLAOXI.jpg)
/cloudfront-us-east-1.images.arcpublishing.com/octane/WJD5OXA77ZG7JDX7B3BDH23TWA.jpg)
/cloudfront-us-east-1.images.arcpublishing.com/octane/BTIM2BEUUFG3LMOWJZKQCJNVYQ.jpg)
/cloudfront-us-east-1.images.arcpublishing.com/octane/M5OFLO75LRBXXPXDVFIRIAKJWM.jpg)
/cloudfront-us-east-1.images.arcpublishing.com/octane/XKZY6QXXCNGBTI2GPLBXCDAJGM.jpg)
/cloudfront-us-east-1.images.arcpublishing.com/octane/EGUXYYBBPJGIXFKBLAUHEE64AM.jpg)
/cloudfront-us-east-1.images.arcpublishing.com/octane/YDQ7T4WQV5HLTOJ73FBUSTIG7U.jpg)

/cloudfront-us-east-1.images.arcpublishing.com/octane/CFIWKW6YTJHFJOQFJSQVTUVQVQ.jpg)
/cloudfront-us-east-1.images.arcpublishing.com/octane/MDLYOI2ETNERRAQBLKPL6ALHHE.jpg)
/cloudfront-us-east-1.images.arcpublishing.com/octane/ZNJWPRR66ZHITCUUDKNDO4NZQI.jpg)