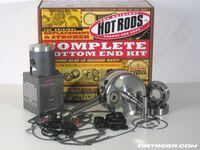
This is the Hot Rods bottom end kit we used to rebuild our 2 stroke engine. It also came with a Vertex Piston.Adam Booth
Put enough hours on a 2 stroke engine and something will let go. For this Yamaha YZ250 motor, it was the crank after 250 hard hours. It made dreaded noises and came to a skidding stop in the middle of the California desert. We feared catastrophic failure, but in the end, it was simply roasted crank bearings.
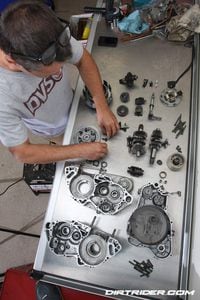
We contacted Hot Rods and ordered up a bottom end kit, which comes with the crankshaft, main bearings and seals, and a complete gasket set. It also included a Vertex piston and rings. We sent the cylinder off to Millennium Technologies for a re-plate. Here is a look at our rebuild of the 2 stroke engine. We highly suggest having a service manual by your side when working with any engine and wish you good luck!
Rebuilding A Top And Bottom End On A 2 Stroke Engine
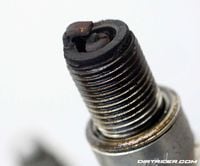
The plug looked a little crusty; it should have been a golden brown. We used a new one when putting the engine back together.Adam Booth
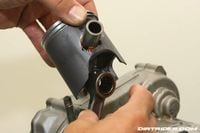
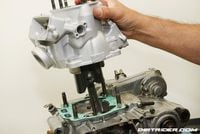
We pulled the head off, loosened the cylinder bolts, and disconnected the power valve before sliding the cylinder off.Adam Booth
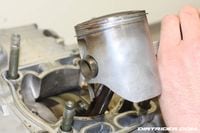
The old piston wasn’t too bad, which is good because we figured the worst when the engine locked up. Here we are pushing out the wrist pin.Adam Booth
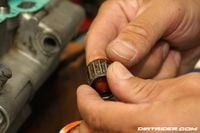
Holy smokes, the rod bearings were smashed square! There was a ton of play up and down on the rod, but thankfully it didn’t grenade into pieces.Adam Booth
Freeze all of the new bearings for at least a day before beginning the rebuild. You need them to be cold and a fraction smaller than normal size so they drop into the cases easier.Adam Booth
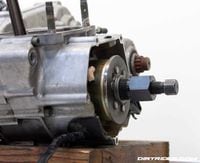
This tool comes in handy; it doubles as a clutch basket holder and has pins on the opposite side that allow you to hold the flywheel so you can remove the nut.Adam Booth
This little handy-dandy flywheel remover is a must. On a 2 stroke, the threads are reversed so don’t spend your afternoon trying to thread it in clockwise.Adam Booth
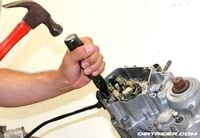
If you have problems removing the Phillips head screws, use an impact tool to get them out. If not, you will strip them.Adam Booth
Moving to the clutch side, remove the right crankcase cover. You can handle this; we trust you.Adam Booth
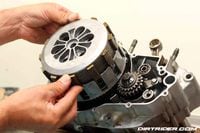
Take care when removing the clutch plates.Adam Booth
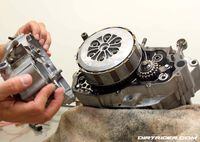
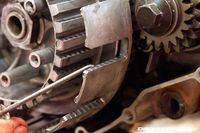
Up close, we are looking for any unusual signs of wear on the clutch basket.Adam Booth
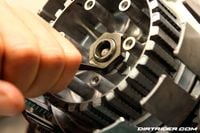
Loosening the clutch basket nut.Adam Booth
That cool tool we showed you now comes in handy again to hold the clutch basket so you can remove the clutch basket nut.Adam Booth
An alternate perspective of the clutch basket.Adam Booth
Remove it and make sure you remember where you took it from.Adam Booth
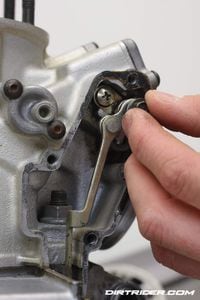
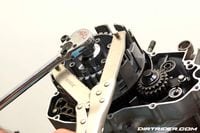
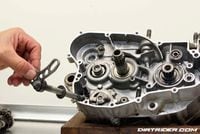
Don’t be afraid to reference your service manual or online manuals when removing the starter gear and drive gears. Out comes the shift shaft!Adam Booth
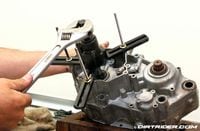
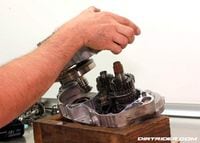
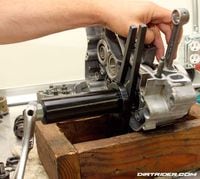
Two-stroke cases are much harder to split than 4 stroke cases and that’s why tools like this were invented. A little tip is to tap around the cases with a rubber mallet as you crank on the case splitter to help the cases split apart.Adam Booth
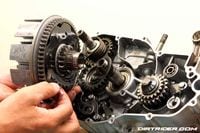
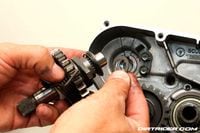
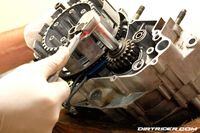
As you lift the left case off, watch for the crank and try not to knock the transmission around too much. It is way easier if you take the transmission out as one cluster and keep it that way.Adam Booth
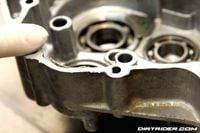
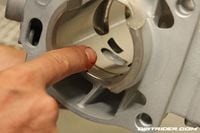
Because the rod bearing had so much play it started rubbing the cases. Luckily it didn’t do much damage because the cost of Yamaha YZ250 cases can run more than $1,000!Adam Booth
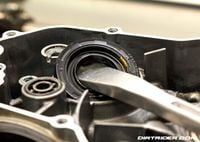
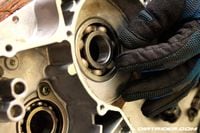
Pull out the crank bearing seals; heat and fire are on the way.Adam Booth
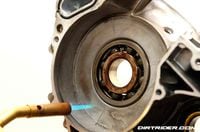
Use a little torch or a hot plate to heat up the cases around the old bearings for a couple of minutes and when you pound out the old bearing; it’ll be a lot easier.Adam Booth
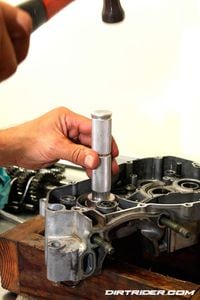
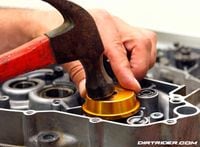
Using a bearing driver, put the beatdown on the old bearing and knock it out of there. If you have a press, it is easier and less violent than using a hammer. With lots of heat, the bearing won’t be too hard to remove.Adam Booth
Stay organized throughout the build; life will be a lot easier.Adam Booth
The new ice-cold and shrunken bearings will drop right into place without force after heating up the cases. We heat the cases for at least five minutes and place the bearings in a freezer overnight. You might have to lightly tap the bearing in, but done right it will drop right into place.Adam Booth
Wait until the cases cool to put in the new seals, and use the proper tools if possible to install the seals.Adam Booth
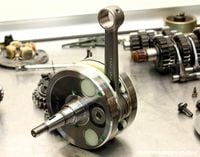
Pulling out the new crank.Adam Booth
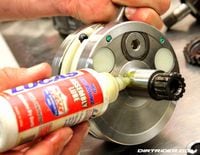
Lubing it up before it finds its home.Adam Booth
Placing the new crank.Adam Booth
To get the new Hot Rods crank seated in the case use a crank puller/installer. Don’t hit it with a hammer unless you want a mushroomed-out crank end.Adam Booth
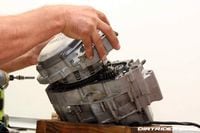
The Yamaha is more tricky than other transmissions so putting it in as one complete unit is the best way. Use assembly lube on all contacting points.Adam Booth
We use Permatex gasket maker gray between the cases, spreading a smooth thin layer.Adam Booth
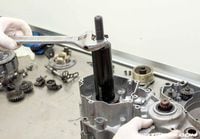
It is important to use the crank puller/installer when putting the cases together. The last thing you want to do is use the case bolts to try and pull the cases together without the cranks fully seated. No bueno.Adam Booth
Always refer to the service manual for torque specs on bolts. We use the handy Motion Pro gear locker to make it easy to keep the internals from spinning.Adam Booth
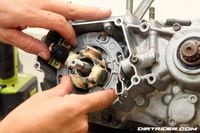
When installing the stator, line it up in the same position you took it off. If in doubt, refer to that manual we’ve been telling you about.Adam Booth
Soak the new clutch plates in oil before installing; you’ll thank us later.Adam Booth
Once everything is back to normal, install the left case cover, torque the bolts, and get ready to install the top end. The end is approaching!Adam Booth
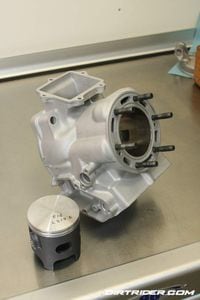
Another piece to the puzzle.Adam Booth
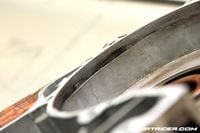
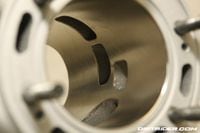
A better view of the cylinder.Adam Booth
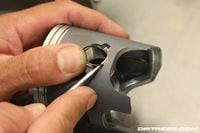
It is easier to install one of the circlips with the piston on the workbench so you only have to do one with the piston on the rod.Adam Booth
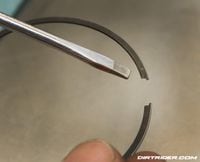
Look for the letter on the ring; it faces up when installing it on the piston.Adam Booth
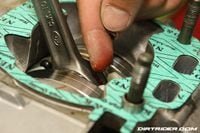
Line up the rings to the locator pins and double-check the clearance of everything.Adam Booth
Time for 2 stroke oil on the rod bearings.Adam Booth
Two-stroke oil on the wrist pin bearing isn’t a bad idea either.Adam Booth
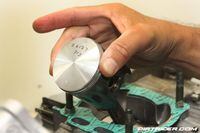
Vertex piston and wrist pin finding their home on the rod.Adam Booth
Lube up the cylinder before installing the piston.Adam Booth
There is an arrow on top of the piston; that should point toward the exhaust port, in this case, the front of the engine.Adam Booth
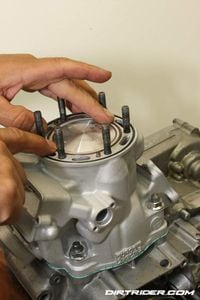
With the rings compressed into the piston, located in the located pins, the cylinder will slide on effortlessly.Adam Booth
Torque the cylinder head nuts to proper torque and sequence.Adam Booth
Time for new head gaskets, which come in the Hot Rods kit.Adam Booth
Torque the head nuts to proper torque per the manual. You’re so close to finishing that you can taste it!Adam Booth
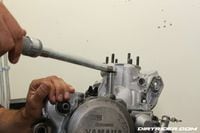
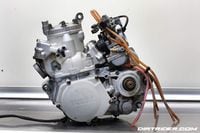
With the carburetor back on and oil in the transmission, this engine is ready to go; just like it did when it was new with the help from Hot Rods, Millennium Technologies, and Vertex.Adam Booth
Racing the rebuilt YZ250 at National Hare & Hound races, racking up the hours on the fresh engine.Mark Kariya


/cloudfront-us-east-1.images.arcpublishing.com/octane/Q6WA3LAHJJDITDQ5JGLJYT7WBY.jpg)
/cloudfront-us-east-1.images.arcpublishing.com/octane/6WCMZLTROBB2VN3764JG2ZUHKU.jpg)
/cloudfront-us-east-1.images.arcpublishing.com/octane/746AB7BEY5BQPA5P2PBQMG23ZM.jpg)
/cloudfront-us-east-1.images.arcpublishing.com/octane/3CZN3LLLEVHK5OH5HIYF6FILTQ.jpg)
/cloudfront-us-east-1.images.arcpublishing.com/octane/KDUWP7VWR5H2NB5QUZ3LGB7DJM.jpg)
/cloudfront-us-east-1.images.arcpublishing.com/octane/KUPAFEM5HNFCXFZ755AOSYO7CE.jpg)
/cloudfront-us-east-1.images.arcpublishing.com/octane/VWWNVEVXQJDKRPJW5H44KER5L4.jpg)
/cloudfront-us-east-1.images.arcpublishing.com/octane/ZNUK7WB7BFHF7JVKP4EOH2LYC4.jpg)
/cloudfront-us-east-1.images.arcpublishing.com/octane/JVQAN5IGQ5FVHIQJPGXIO2NDKE.jpg)
/cloudfront-us-east-1.images.arcpublishing.com/octane/RRCC76NNFBGY3H5W34MCMSQHYE.jpg)
/cloudfront-us-east-1.images.arcpublishing.com/octane/IKYIRQPYQ5AKVEA44OIDEDBKFE.jpg)


/cloudfront-us-east-1.images.arcpublishing.com/octane/MV3PCT57DJF4TFQM2TYWISVXMU.jpg)
/cloudfront-us-east-1.images.arcpublishing.com/octane/A4IIDZ5AW5HPDAADHXDWFCE7II.jpg)
/cloudfront-us-east-1.images.arcpublishing.com/octane/23SHOWDGB5F4BEYYXZVMJKJL2U.jpg)
/cloudfront-us-east-1.images.arcpublishing.com/octane/CEJLRGGRUBHNLHK6KDDBQVLERU.jpg)
/cloudfront-us-east-1.images.arcpublishing.com/octane/UFBO2D6FLVG73HRJ6SIQJ5ECIA.jpg)

/cloudfront-us-east-1.images.arcpublishing.com/octane/N3F5QWYWJJGLTGVS22OGGLGFZA.jpg)
/cloudfront-us-east-1.images.arcpublishing.com/octane/VBKXIMVWHNGITN7LJVM6VU6XPM.jpg)
/cloudfront-us-east-1.images.arcpublishing.com/octane/FRY33AEOSBAELNVNPVIZTBPHFY.jpg)
/cloudfront-us-east-1.images.arcpublishing.com/octane/RJY3UQXTM5DVVNHVUSUDYTFFUE.jpg)
/cloudfront-us-east-1.images.arcpublishing.com/octane/VK32B7QN4ZFENITOLWTER4BZX4.jpg)